
If you publish content regularly, you already know the image workflow: resize, compress, rename, write alt text, upload to your CMS, fill in the metadata fields. For one image, it takes a couple of minutes. For a blog post with ten images, it takes twenty minutes. For a weekly publishing schedule, that's hours of repetitive work every month.
The fix isn't working faster, it's processing images in batches instead of one at a time.
The One-at-a-Time Problem
Most content workflows handle images individually:
- Take or source the image
- Open it in an editor or compression tool
- Resize and export
- Rename the file
- Upload to the CMS
- Fill in title, alt text, caption, description
- Repeat for the next image
Each step is quick, but the context-switching adds up. You're bouncing between your file system, a compression tool, your CMS admin panel, and possibly a spreadsheet tracking metadata. Every switch costs focus and time.
For a team publishing 3-5 posts per week with 5-10 images each, that's 15-50 images processed individually, every single week.
What Batch Processing Looks Like
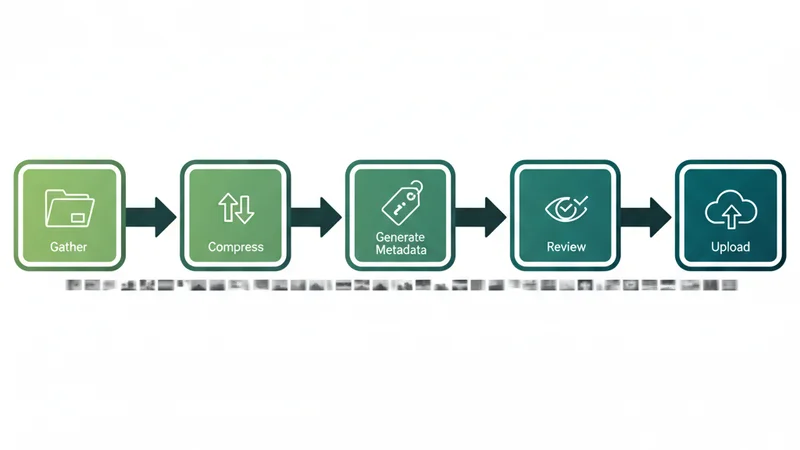
A batch workflow handles the repetitive steps for all images at once:
- Gather - collect all images for a post (or multiple posts) into a single folder
- Compress - run the entire batch through compression in one operation
- Generate metadata - produce titles, alt text, descriptions, captions, and filenames for every image at once
- Review - scan the batch output and make adjustments where needed
- Upload - push all images to your CMS in a single operation, with metadata already attached
The key difference is that steps 2-5 happen once for the whole batch, not once per image.
Time Savings in Practice
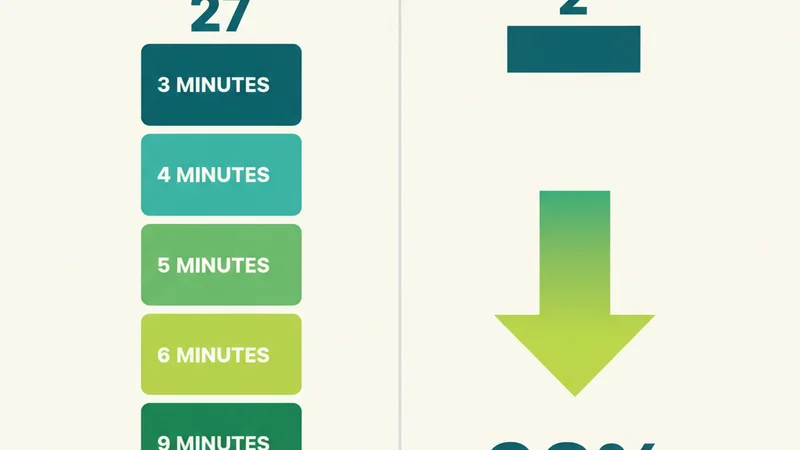
Here's a realistic comparison for a blog post with 8 images:
| Task | One at a Time | Batch |
|---|---|---|
| Compression | 8 × 30s = 4 min | 30s total |
| Renaming files | 8 × 15s = 2 min | Automatic |
| Writing metadata | 8 × 90s = 12 min | 30s (review only) |
| Uploading to CMS | 8 × 20s = 2.5 min | 30s total |
| Filling CMS fields | 8 × 45s = 6 min | Automatic |
| Total | ~27 min | ~2 min |
That's 25 minutes saved per post. Over a year of weekly publishing, that's over 21 hours recovered, more than two full working days.
For larger teams or higher-volume sites, the savings multiply. An e-commerce team uploading 50 product images per week saves even more.
Building a Batch Workflow
Step 1: Organise Input by Post or Project
Before processing, group your images logically. If you're working on a blog post about camping gear, put all the camping images in one folder. This makes it easy to:
- Apply consistent context for metadata generation
- Review output as a coherent set
- Upload everything to the right place
Step 2: Choose Your Compression Settings Once
Decide on format (WebP is the default choice for most web use), quality level (75-85% for most content), and maximum dimensions. Apply these settings to the entire batch.
Don't waste time adjusting settings per image unless you have a specific reason, like a hero image that needs higher quality or a thumbnail that can tolerate more compression.
Step 3: Generate Metadata with Context
Generic metadata is better than no metadata, but contextual metadata is better than generic. If your batch is for a post about "summer hiking essentials", that context should inform the generated alt text, titles, and descriptions.
For example, instead of:
Alt: "Blue water bottle on rock"
Context-aware generation produces:
Alt: "Insulated blue water bottle resting on granite rock during summer hike"
The second version is more descriptive and more relevant to the content it accompanies.
SquishMate lets you provide context (a URL, a topic description, or keywords) that the AI uses when generating metadata. This means every image in your batch gets metadata that's relevant to your specific content, not just a literal description of pixels.
Step 4: Review Before Publishing
Automation should save you time, not replace your judgement. After a batch is processed, scan through the output:
- Do the filenames make sense?
- Is the alt text accurate and descriptive?
- Do any captions need a human touch?
A quick review of 10 images takes under a minute. Editing one or two that need tweaking takes another minute. That's far less than writing everything from scratch.
Step 5: Upload with Metadata Attached
The biggest time sink in most CMS workflows is filling in metadata fields after upload. If your images arrive in the CMS with metadata already attached, this step disappears entirely.
SquishMate uploads directly to WordPress with all five metadata fields (title, alt text, description, caption, filename) pre-populated. There's nothing to fill in after upload, the images are ready to insert into your content immediately.
Common Batch Scenarios

Blog Content
A typical blog post needs 3-8 images: a hero image, supporting photos or screenshots, and possibly charts or diagrams. Batch processing the full set takes under a minute.
E-commerce Product Pages
Product catalogues are the highest-volume use case. A single product might need 4-6 images (front, back, detail shots, lifestyle images). A catalogue update with 20 new products means 80-120 images.
Portfolio Updates
Photographers, designers, and agencies regularly upload project galleries. A batch of 20-30 portfolio images with consistent metadata makes the gallery immediately searchable and SEO-friendly.
Content Migrations
Moving content between platforms often means re-uploading hundreds or thousands of images. Batch processing ensures every image arrives at the new platform with clean filenames and complete metadata.
What to Look For in a Batch Tool
Not all image tools support true batch processing. Key capabilities to look for:
- Folder upload - drag in an entire folder, not just individual files
- Consistent settings - apply compression and format settings to the whole batch
- Bulk metadata - generate metadata for all images, not one at a time
- Direct CMS upload - push to your CMS without manual re-upload
- Context input - provide topic context that applies to the whole batch
Quick Checklist
- Group images by post or project before processing
- Set compression format and quality once per batch
- Provide content context for better metadata generation
- Review generated metadata (scan, don't rewrite)
- Upload the full batch with metadata attached
- Measure time saved compared to your old workflow
Try It On Your Next Post
Take your next blog post's images, probably 5-10 files, and process them as a single batch instead of one at a time. Compress, generate metadata, and upload in one pass. Time yourself. Compare it to how long your last post took. The difference is usually enough to make batch processing your default from that point on.